Adding cryptocurrency or different tokens to your MetaMask wallet is important for managing assets across various blockchain networks. Equally essential is knowing how to add a network, such as the Polygon Matic Network, to your MetaMask wallet. Polygon enhances Ethereum’s capabilities by providing faster and more economical transactions, reducing transaction costs. Integrating Polygon into MetaMask allows users to manage their assets across both ecosystems easily.
This guide will walk you through adding Polygon to your MetaMask wallet, ensuring access to a versatile, cost-effective blockchain experience. MetaMask, a popular crypto wallet app and browser extension, allows users to interact with decentralized applications (dApps) across different blockchain networks. Anyone can set up a MetaMask wallet and explore the Polygon ecosystem in just a few simple steps.
How to Connect Polygon Network to Metamask Wallet?
Regardless of your experience level in cryptocurrency, adding Polygon network to MetaMask is simple and can be done without hassle. In this guide, we will walk you through the entire process step by step. Plus, we’ll show you not one but three different methods to connect Polygon (MATIC) to your MetaMask, ensuring you find the approach that suits you best:
- Automatically and manually adding Polygon to the MetaMask browser extension extension
- Integrating Polygon in the MetaMask Mobile App
- Using ChainList to Add Polygon to MetaMask
If you’re new to MetaMask, don’t worry. The first step is to create an account, and then you’ll be all set to follow along with our easy-to-understand guide.
Add Polygon Network to MetaMask Wallet Manually
Step 1. Connect to Your MetaMask Wallet Account
Before adding Polygon (MATIC) to MetaMask, ensure you are connected to your existing MetaMask wallet. Open the MetaMask extension and unlock your wallet using your private key.
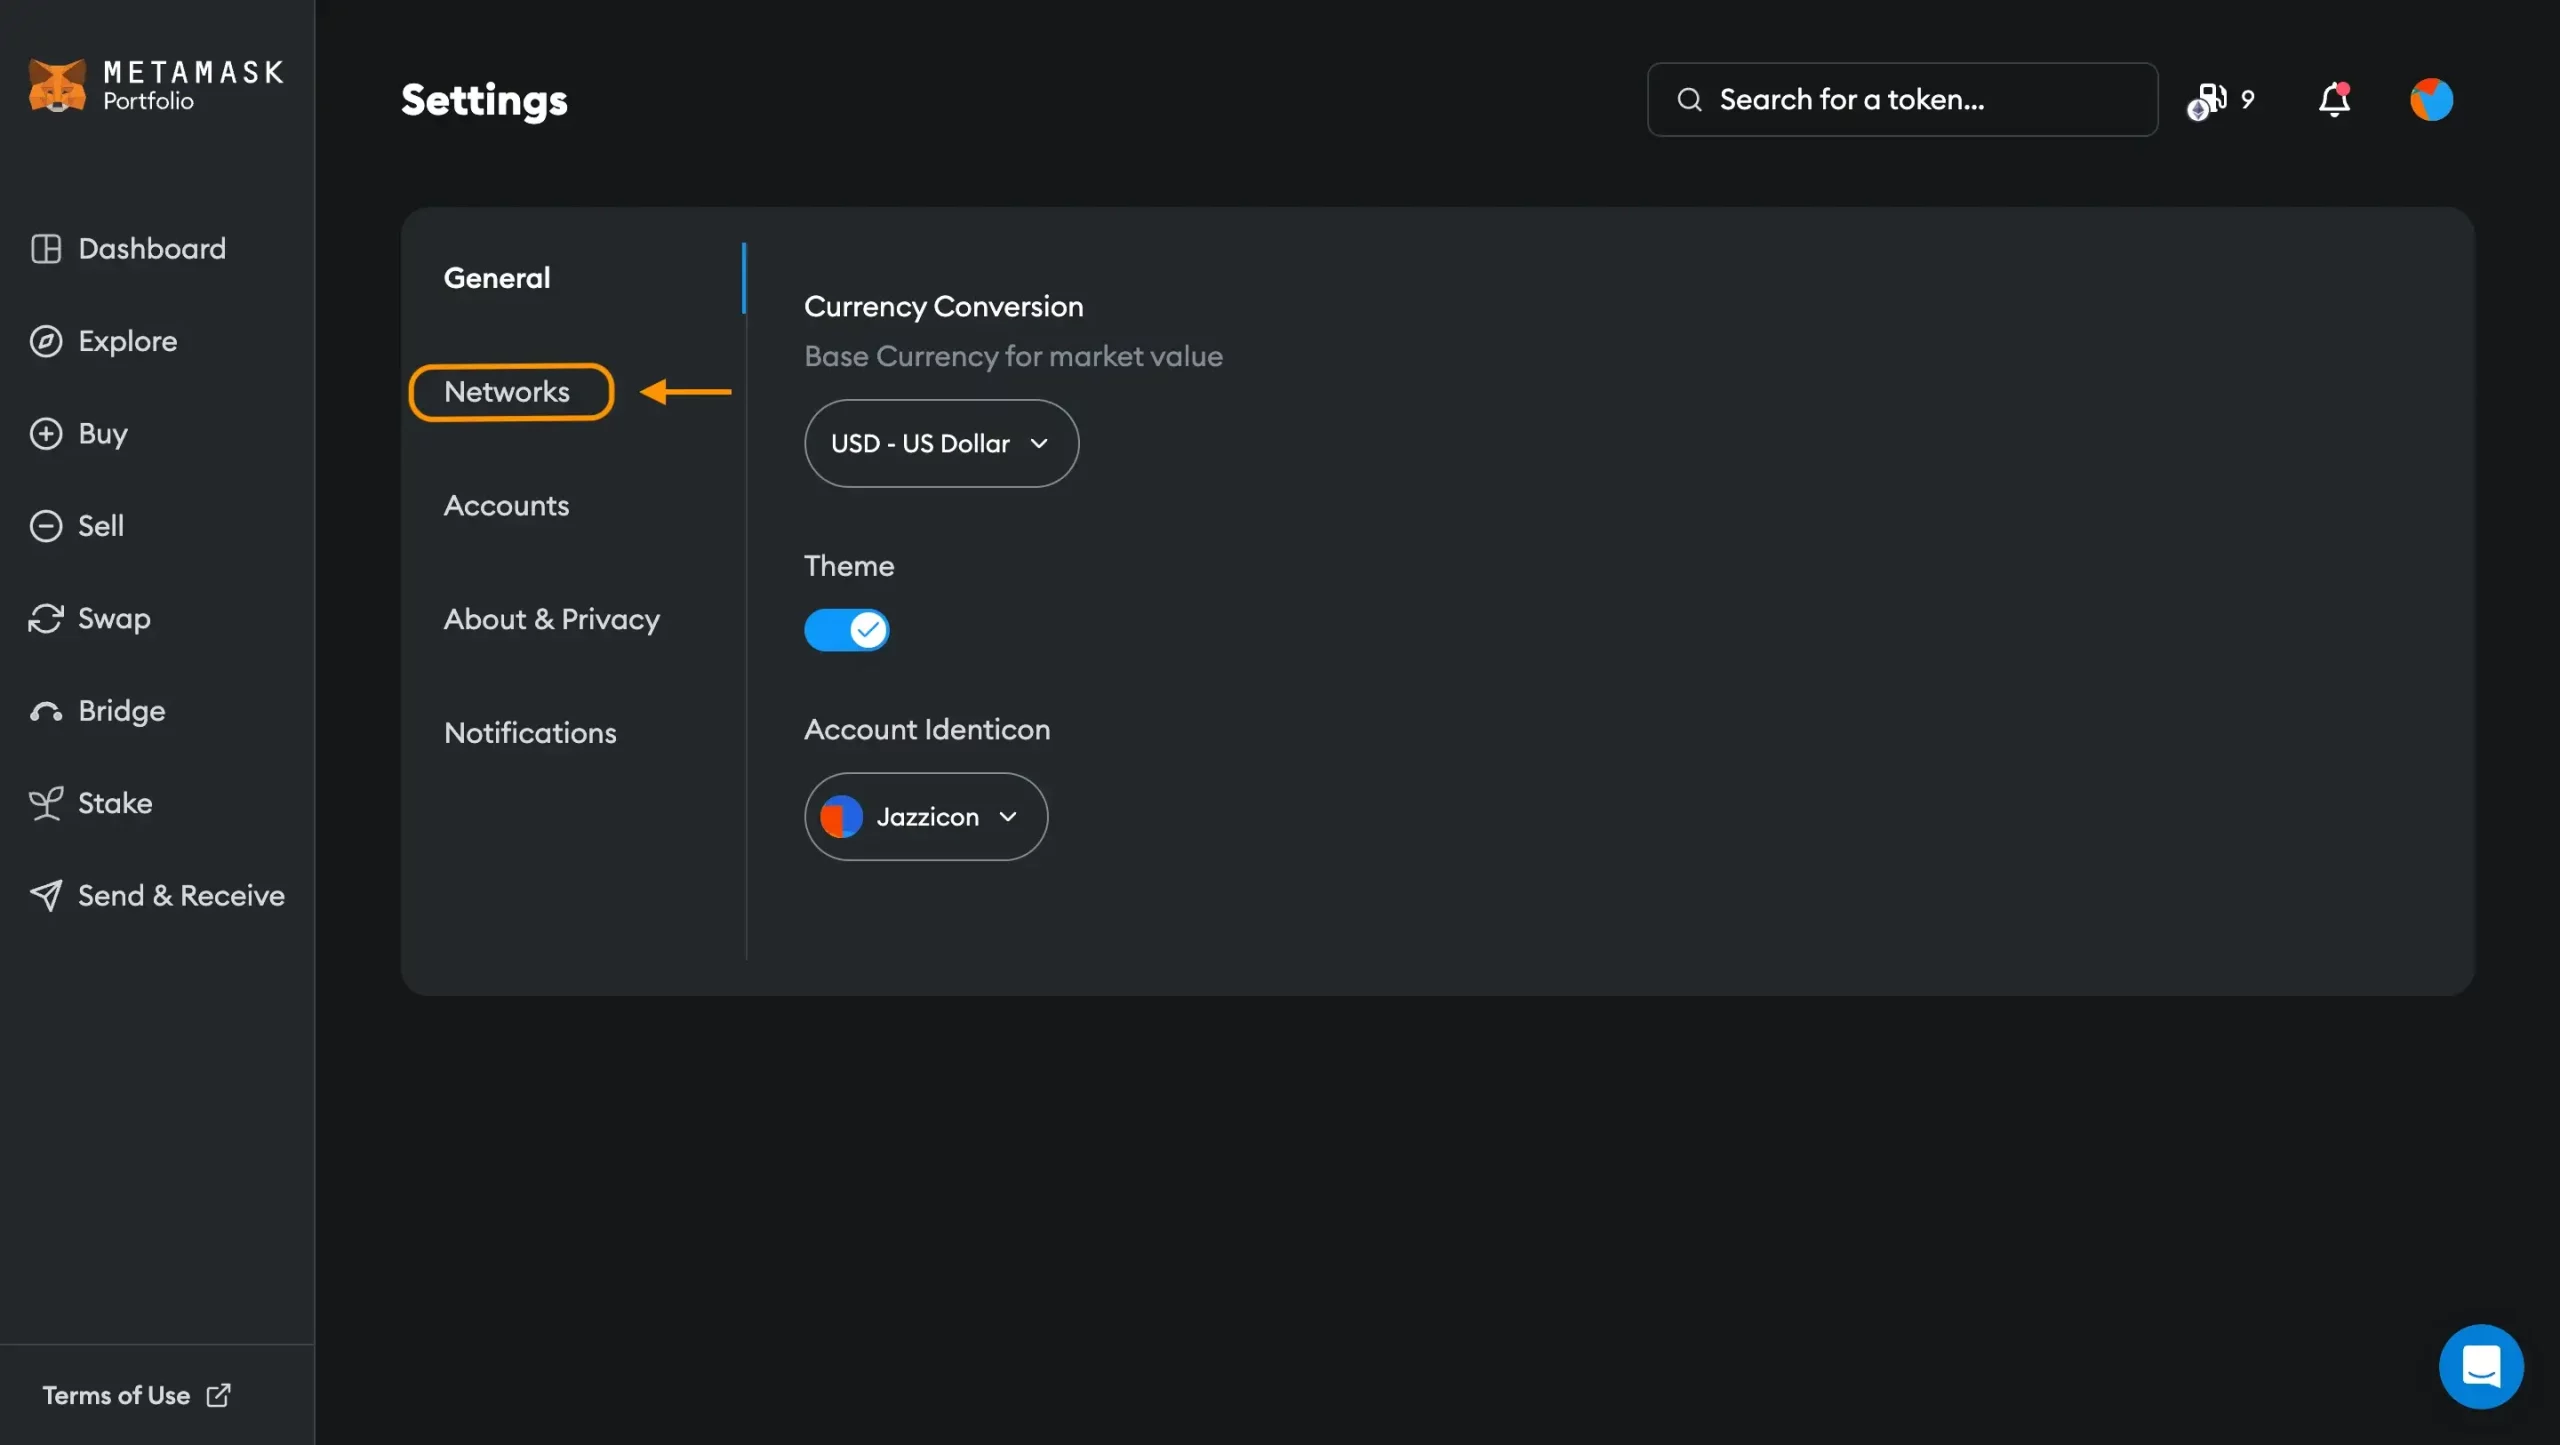
Step 2. Select Setting from the DropDown Menu
Click the MetaMask icon at the top right corner of your browser to open the wallet UI. From the account options, go to Settings.
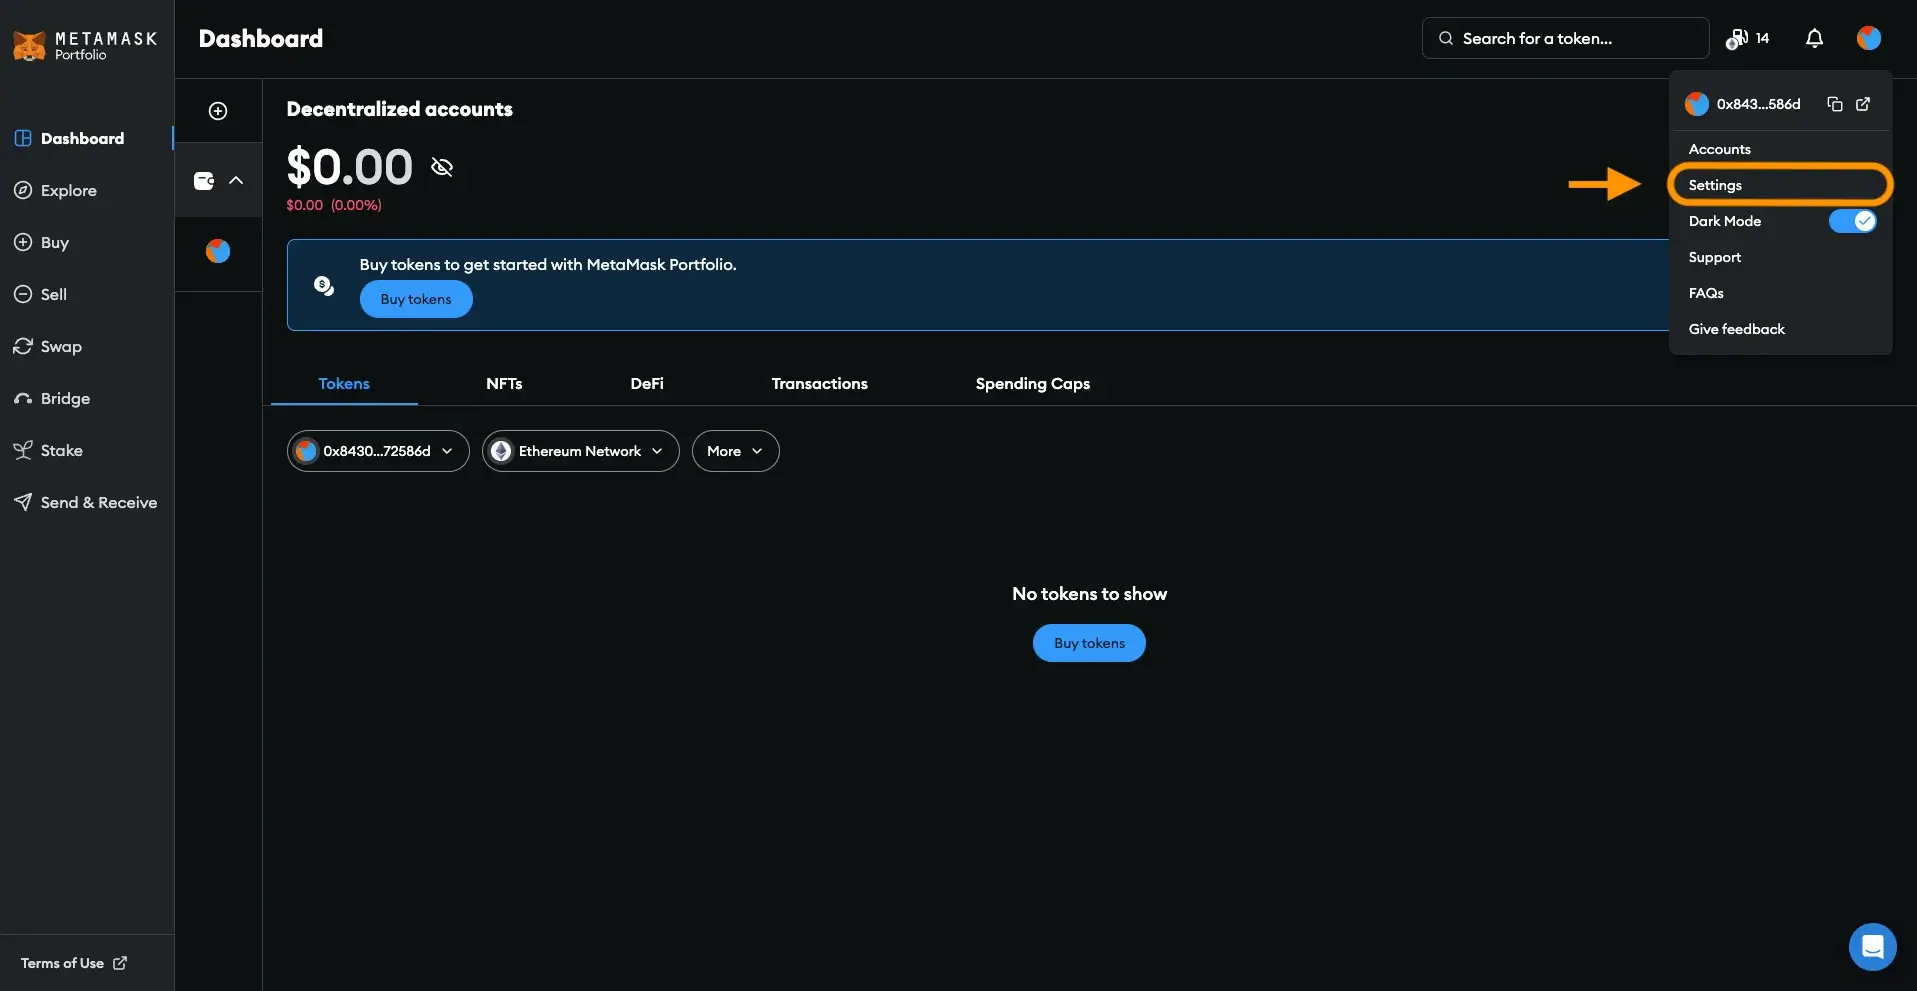
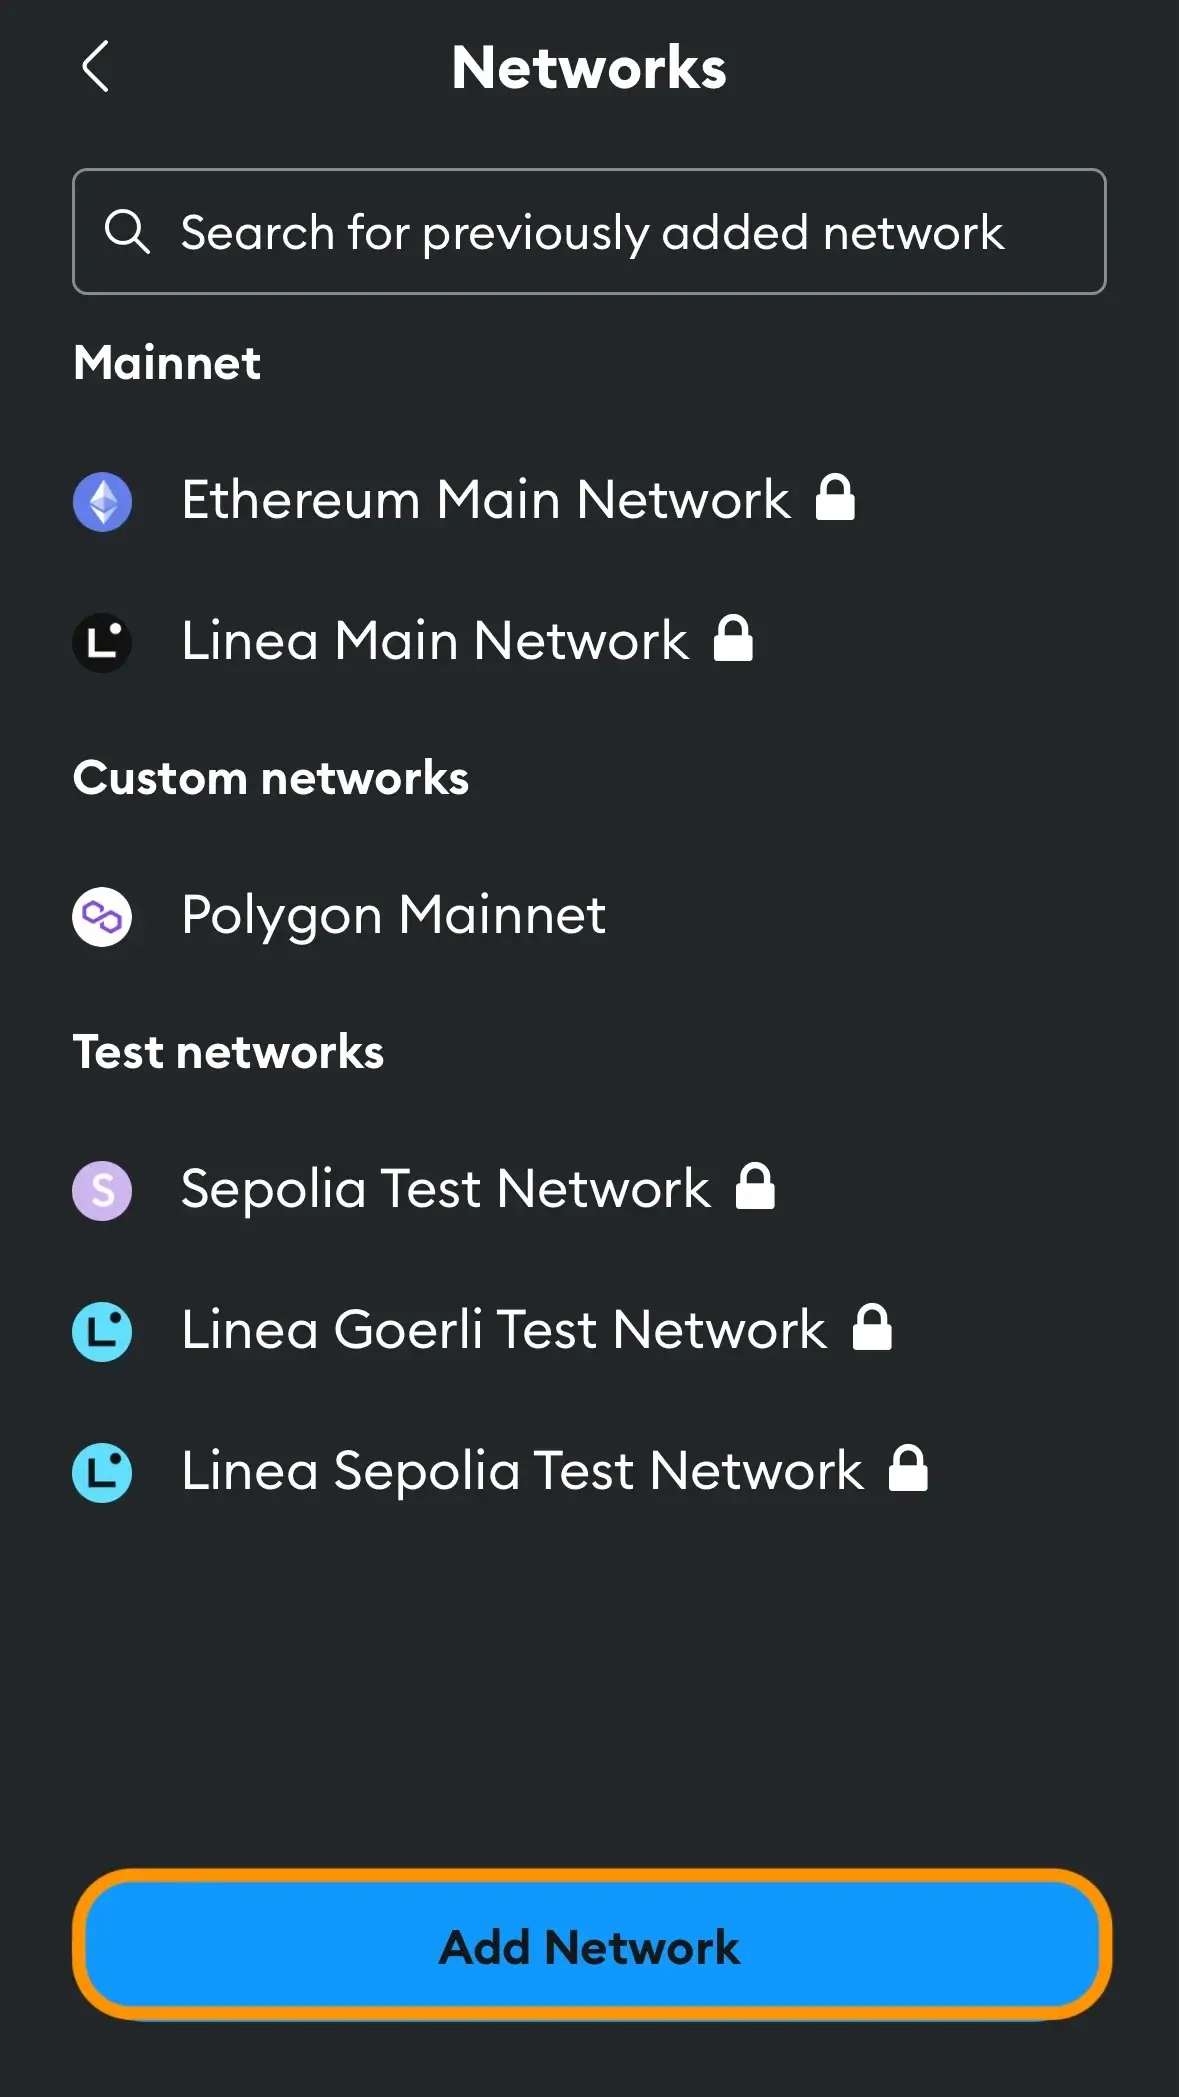
Step 3. Click on the Networks Option
In Settings, click on the networks option, where you will find your network dropdown menu, and add Polygon (MATIC) to it.
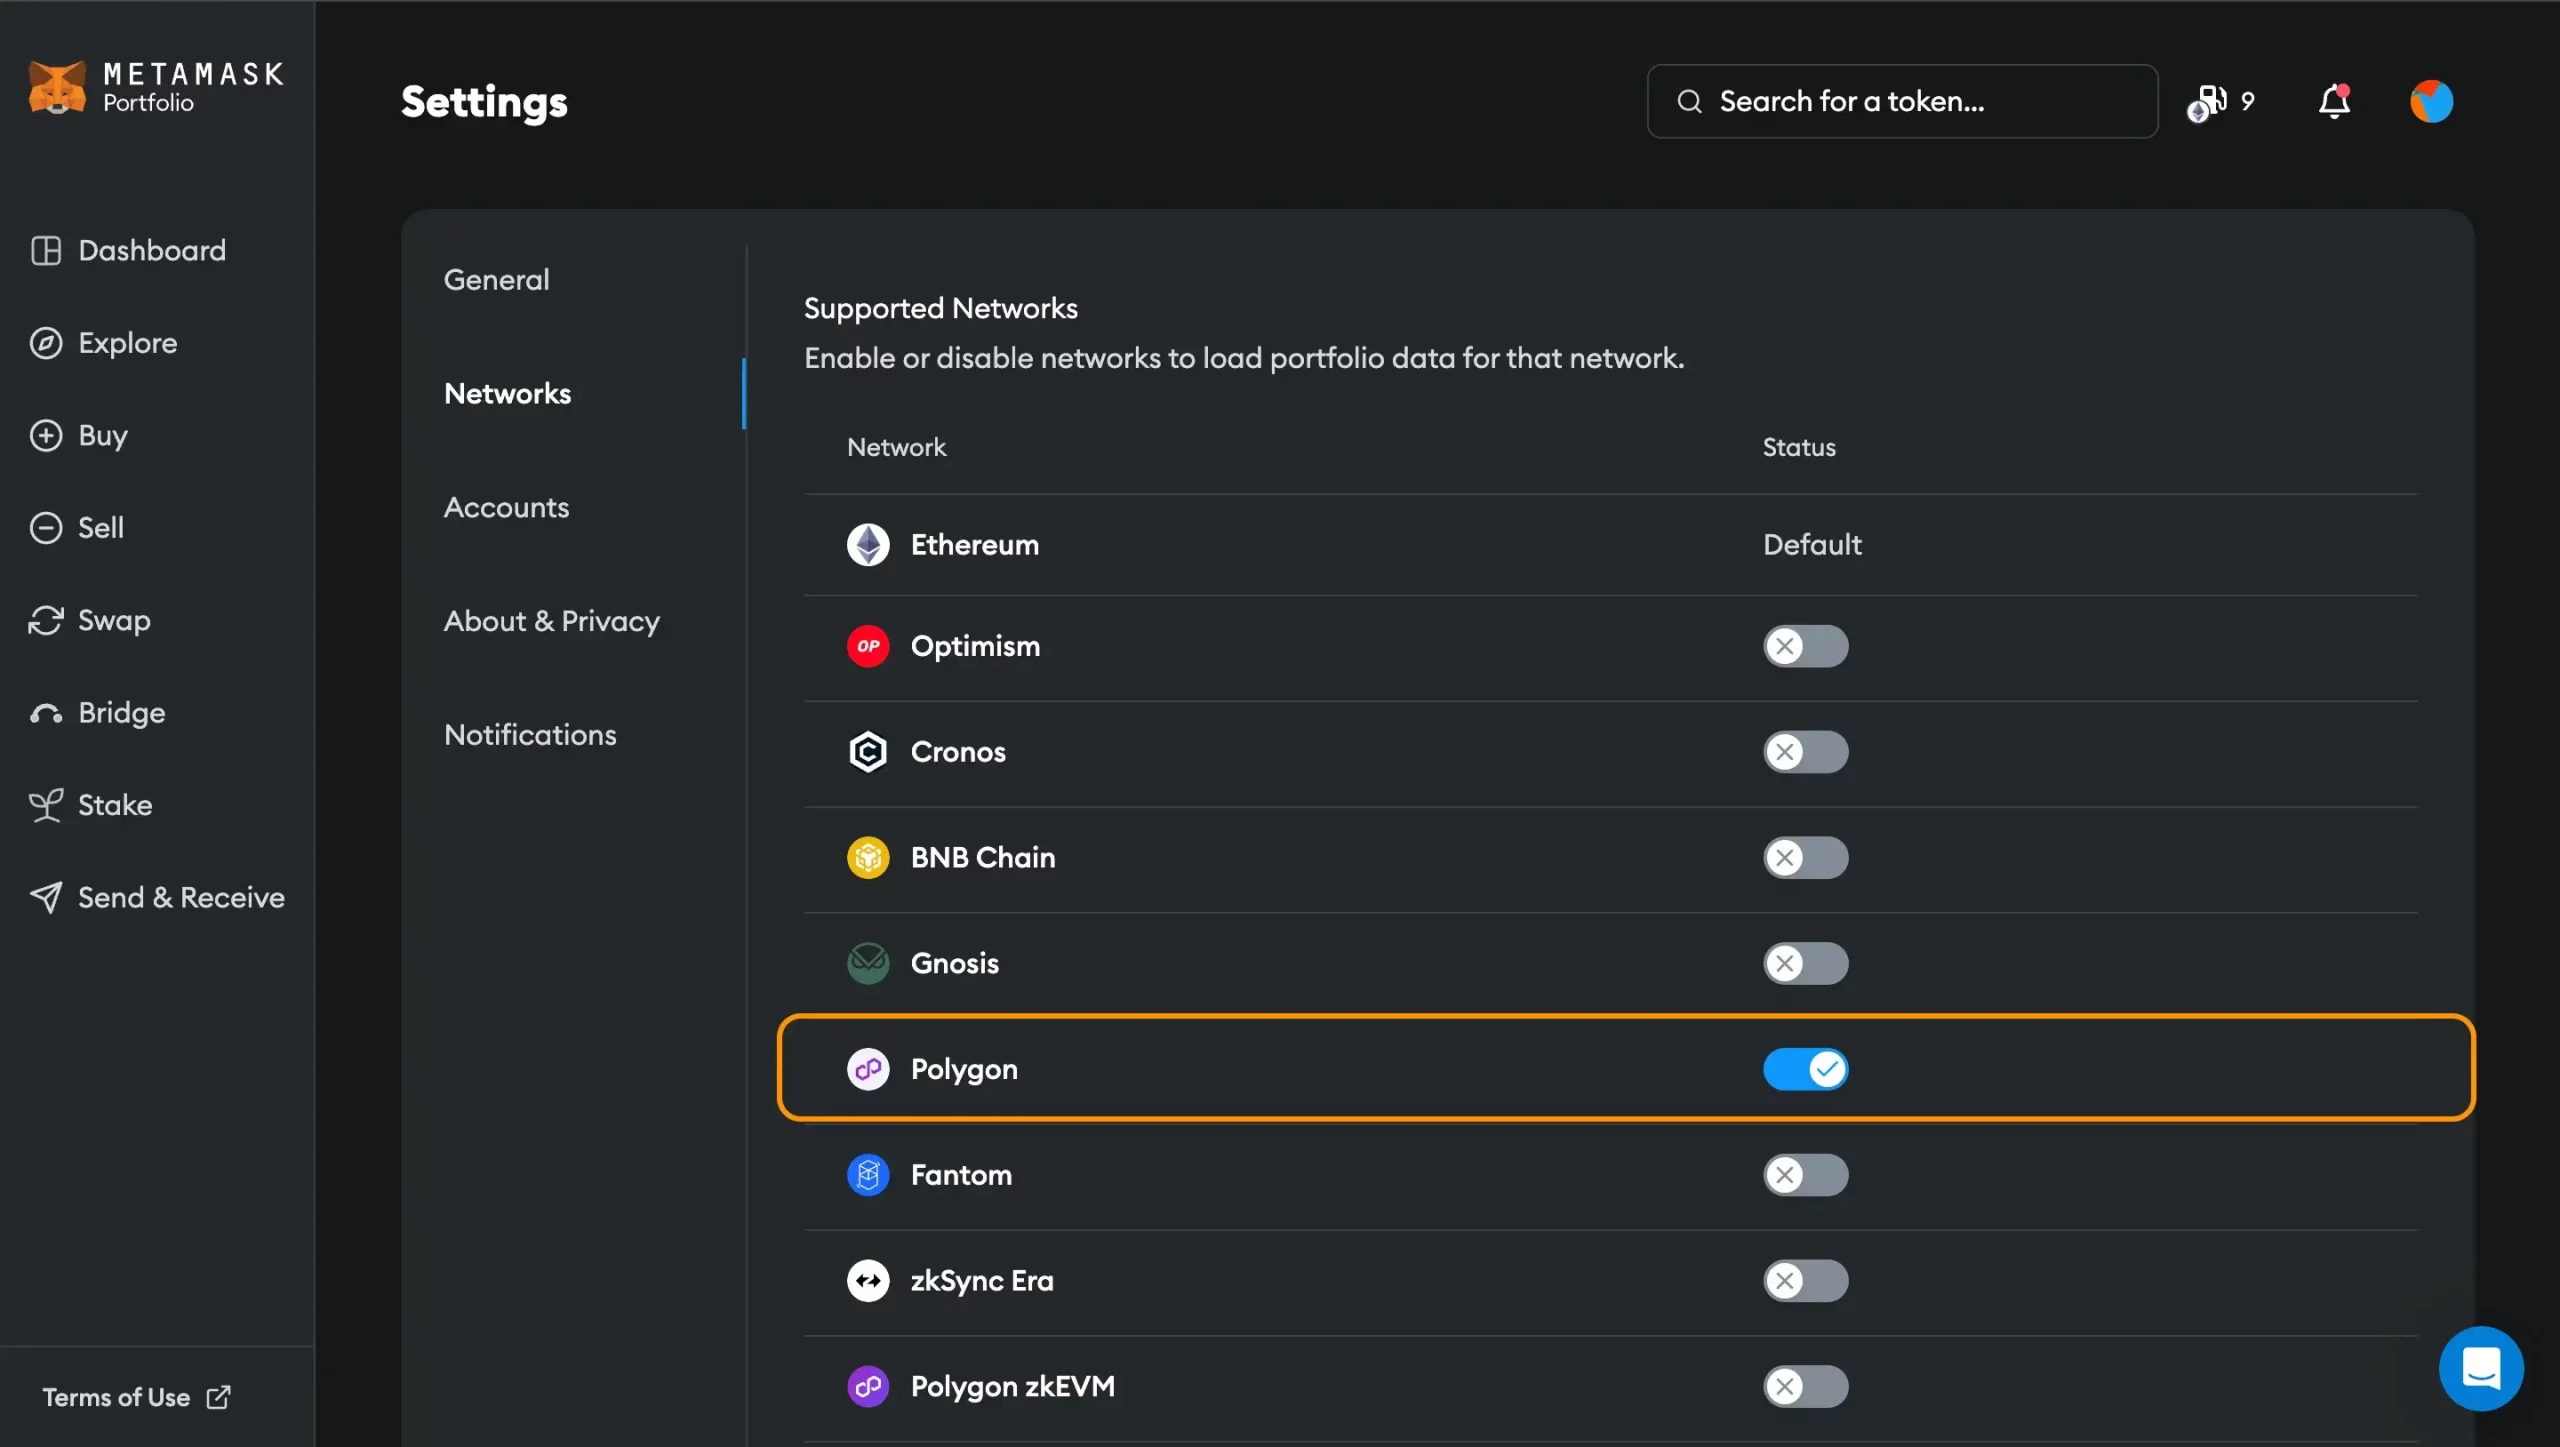
Step 4. Search for Polygon Network
The Metamask platform will provide you with a list of supported networks where you will find Polygon. To add the network, you must first activate it; simply click on it to turn the blue button. This will automatically add it to your network list.
Steps to Add Polygon Automatically to the Metamask wallet
To add the Polygon network to your MetaMask wallet automatically, you can follow these simple steps:
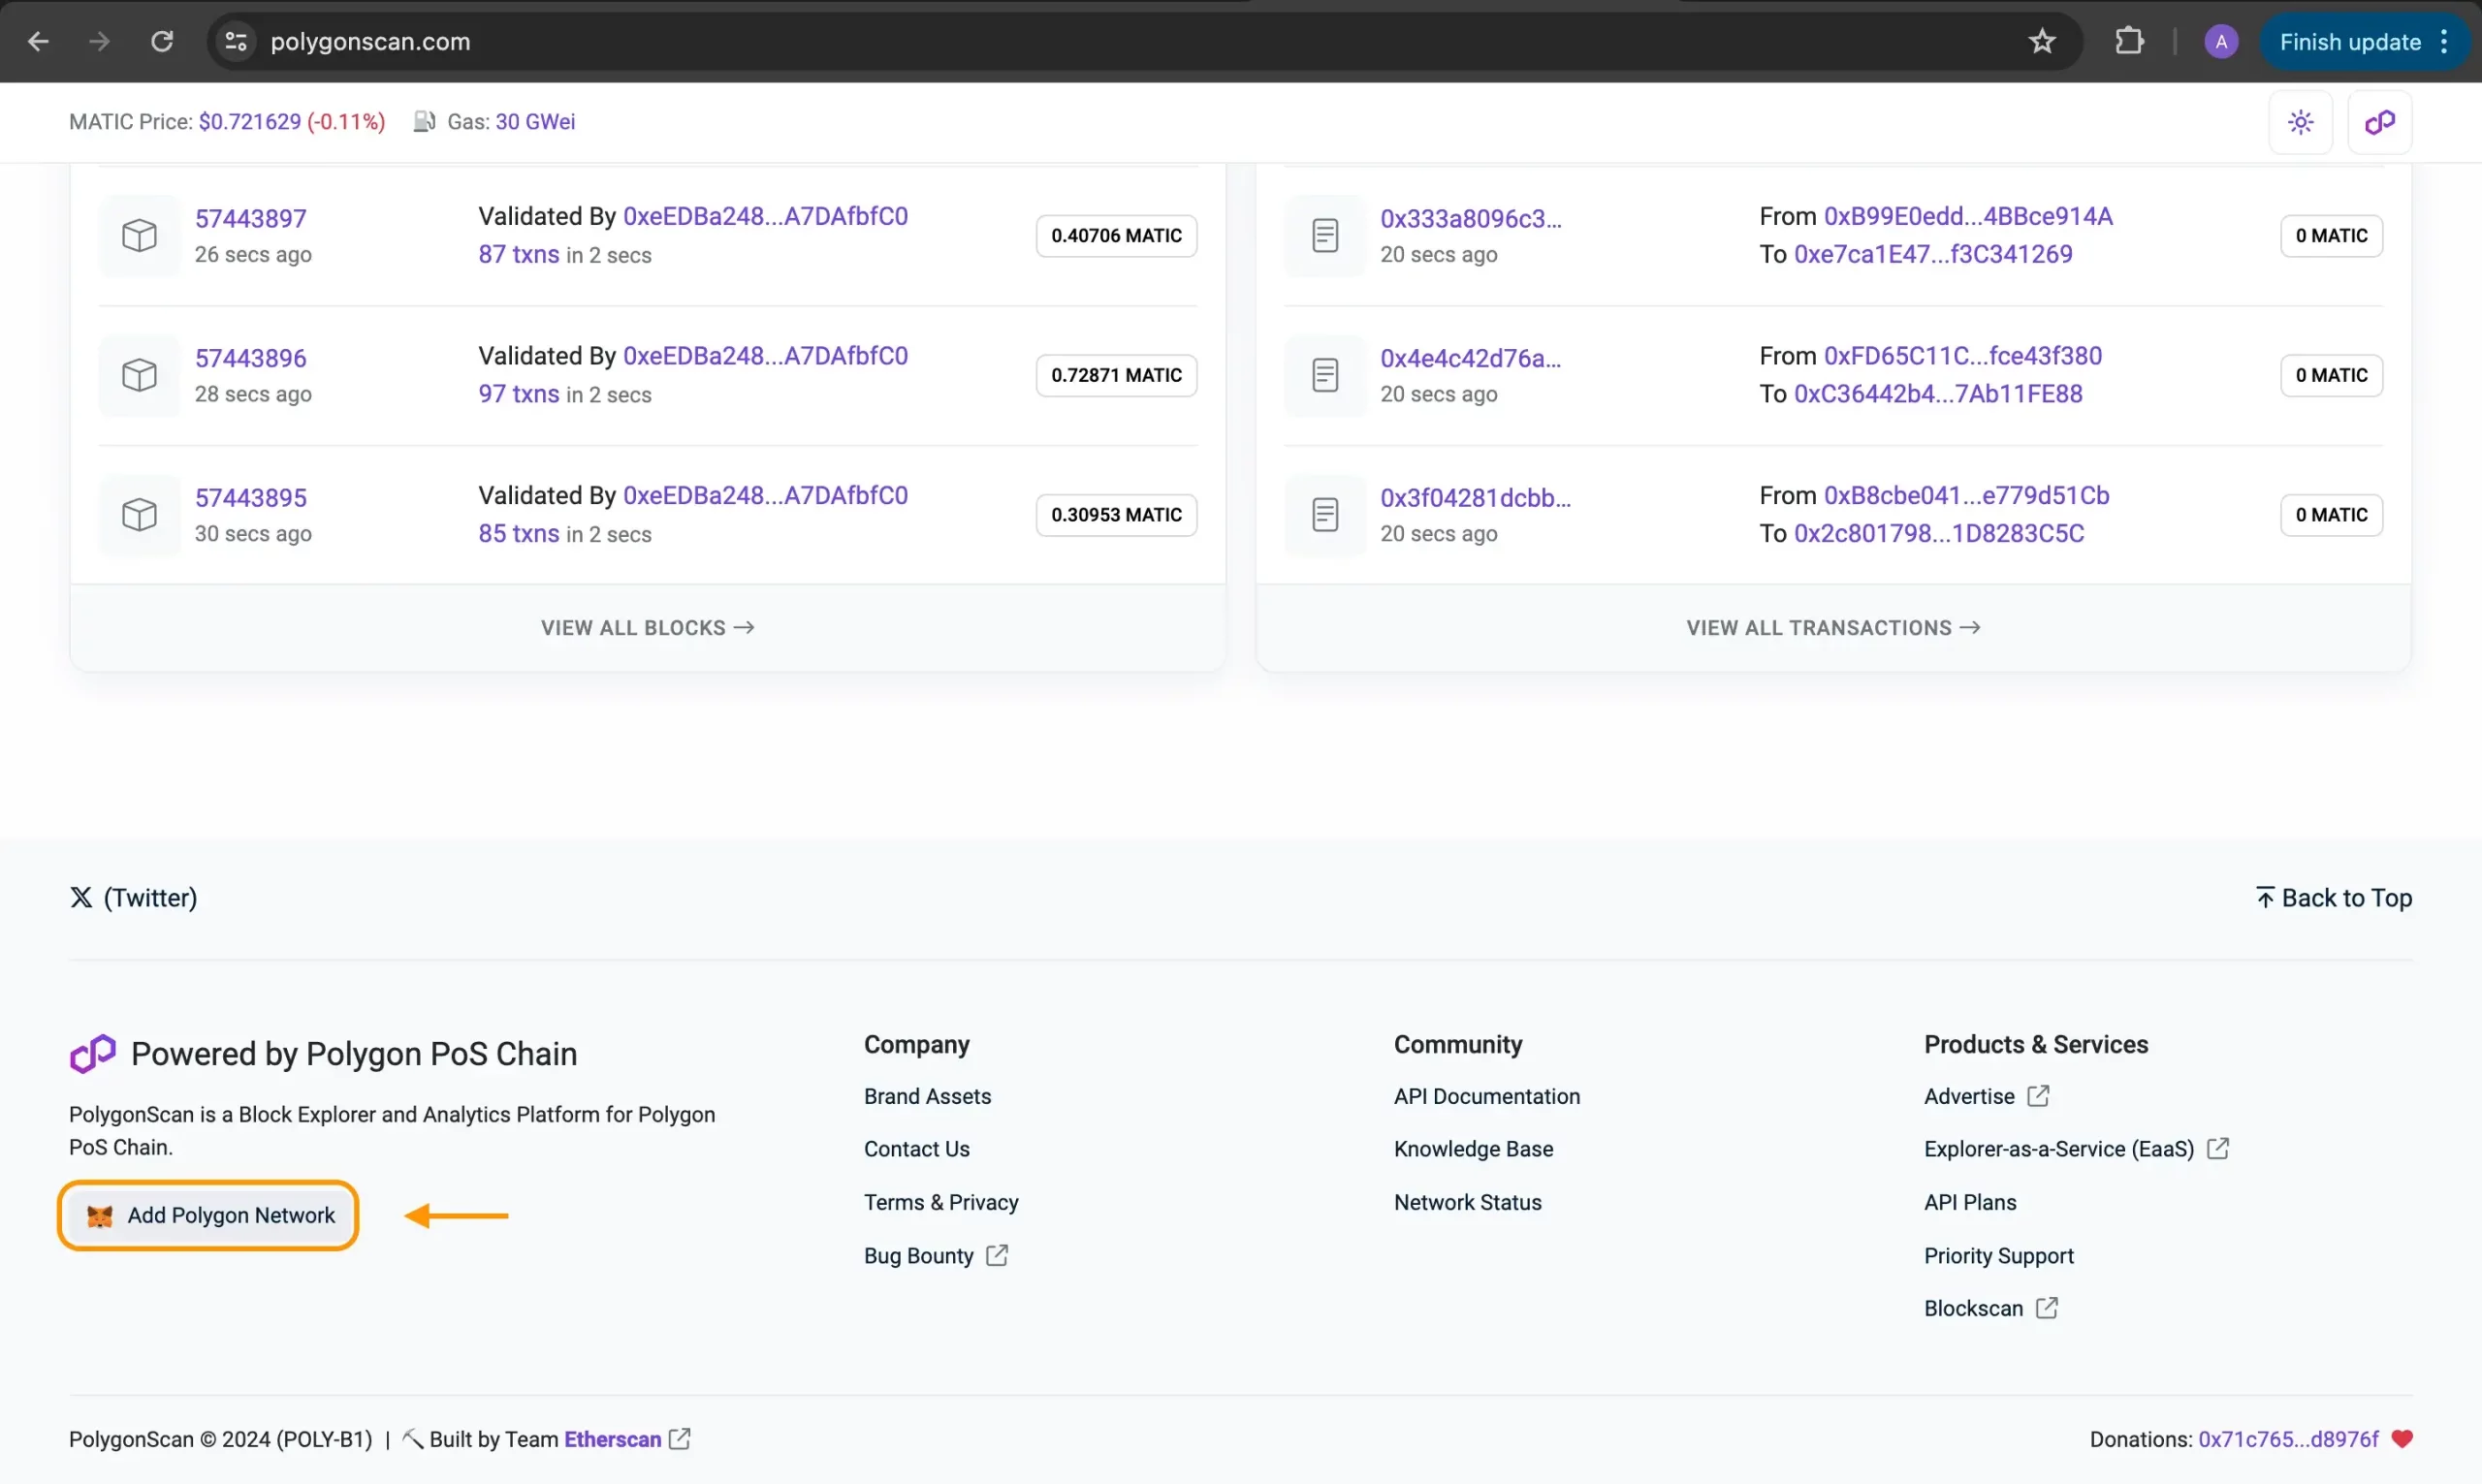
Step 1: Connect to MetaMask and Visit PolygonScan.
First, ensure you’re connected to the selected wallet account in MetaMask.
Step 2: Add Polygon to MetaMask Automatically.
Go to https://polygonscan.com, then scroll to the bottom of PolygonScan and click the button to add a Polygon to MetaMask. MetaMask will automatically fill in the full network configuration details. Instead of manually adding the full network configuration details to the MetaMask account, you can do it through Polygon Scan by clicking at the bottom of the page. Review the network details and click “Approve” to confirm the addition.
Step 3: Confirm Network Addition MetaMask Notification.
Confirm the addition by reviewing the network details (such as the Network Name, New RPC URL, Chain ID, Symbol, and Block Explorer URL) and clicking the approval button.
Step 4: Integrate Polygon Into Your MetaMask Wallet
Once added, the Polygon network will appear in the network selection and the network settings dropdown menu within MetaMask, allowing you to switch to it anytime.
This process simplifies the integration of the Polygon network into your MetaMask wallet, enabling you to interact with it without manually entering all the Polygon network details again.
Add Polygon to MetaMask Mobile App
To add the Polygon network to the mobile app, you should follow these steps in order to do it correctly:
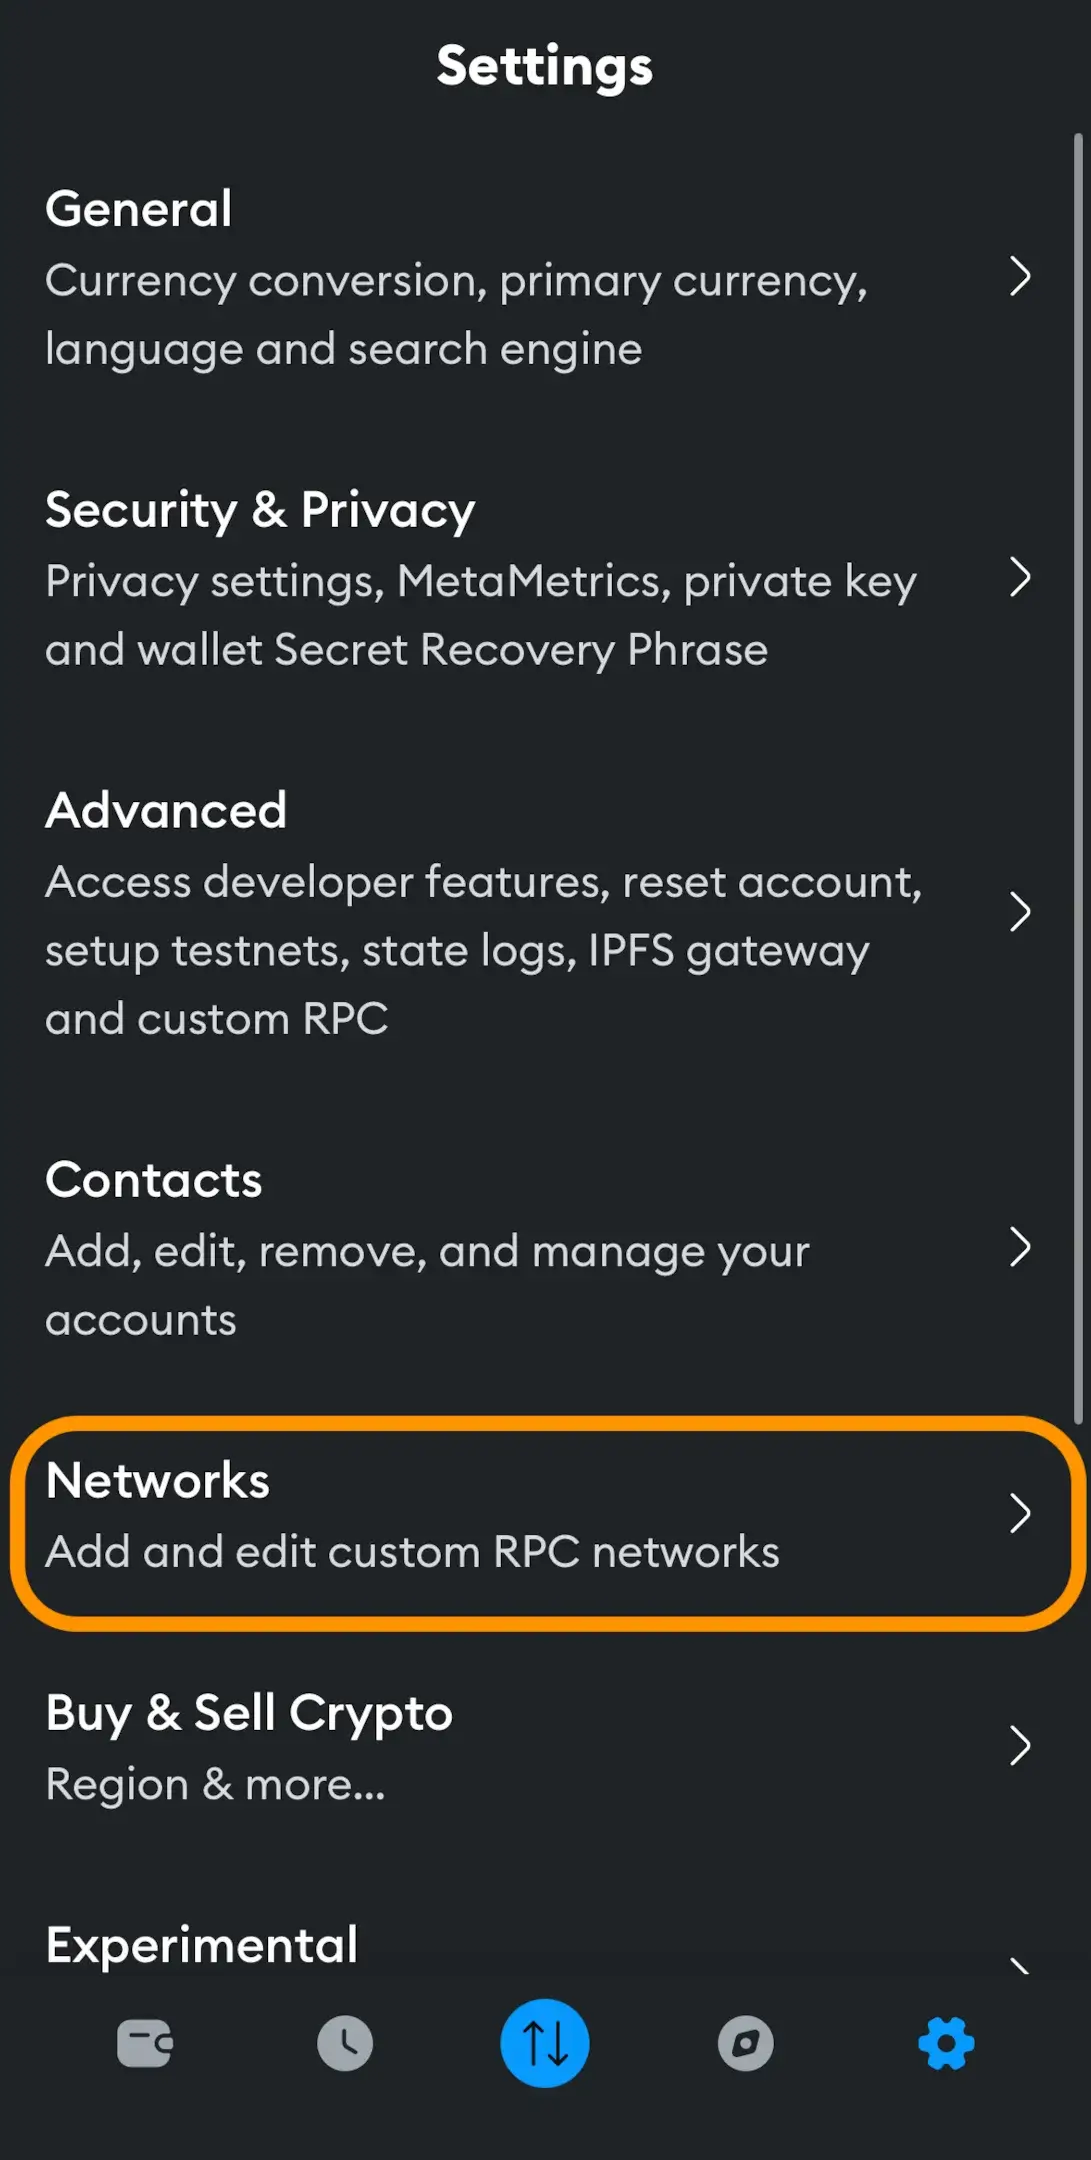
Step 1: Log Into the Mobile App and Go to Settings
Open the MetaMask mobile app and log in. Tap the menu icon at the top right corner to go to Settings.
Step 2: Access Network Settings
Navigate to Networks in the Settings menu.
Step 3: Search and Select the Polygon Network or Add the Network manually
Use the search bar from the newly opened page to search for the Polygon or manually add Polygon to MetaMask.
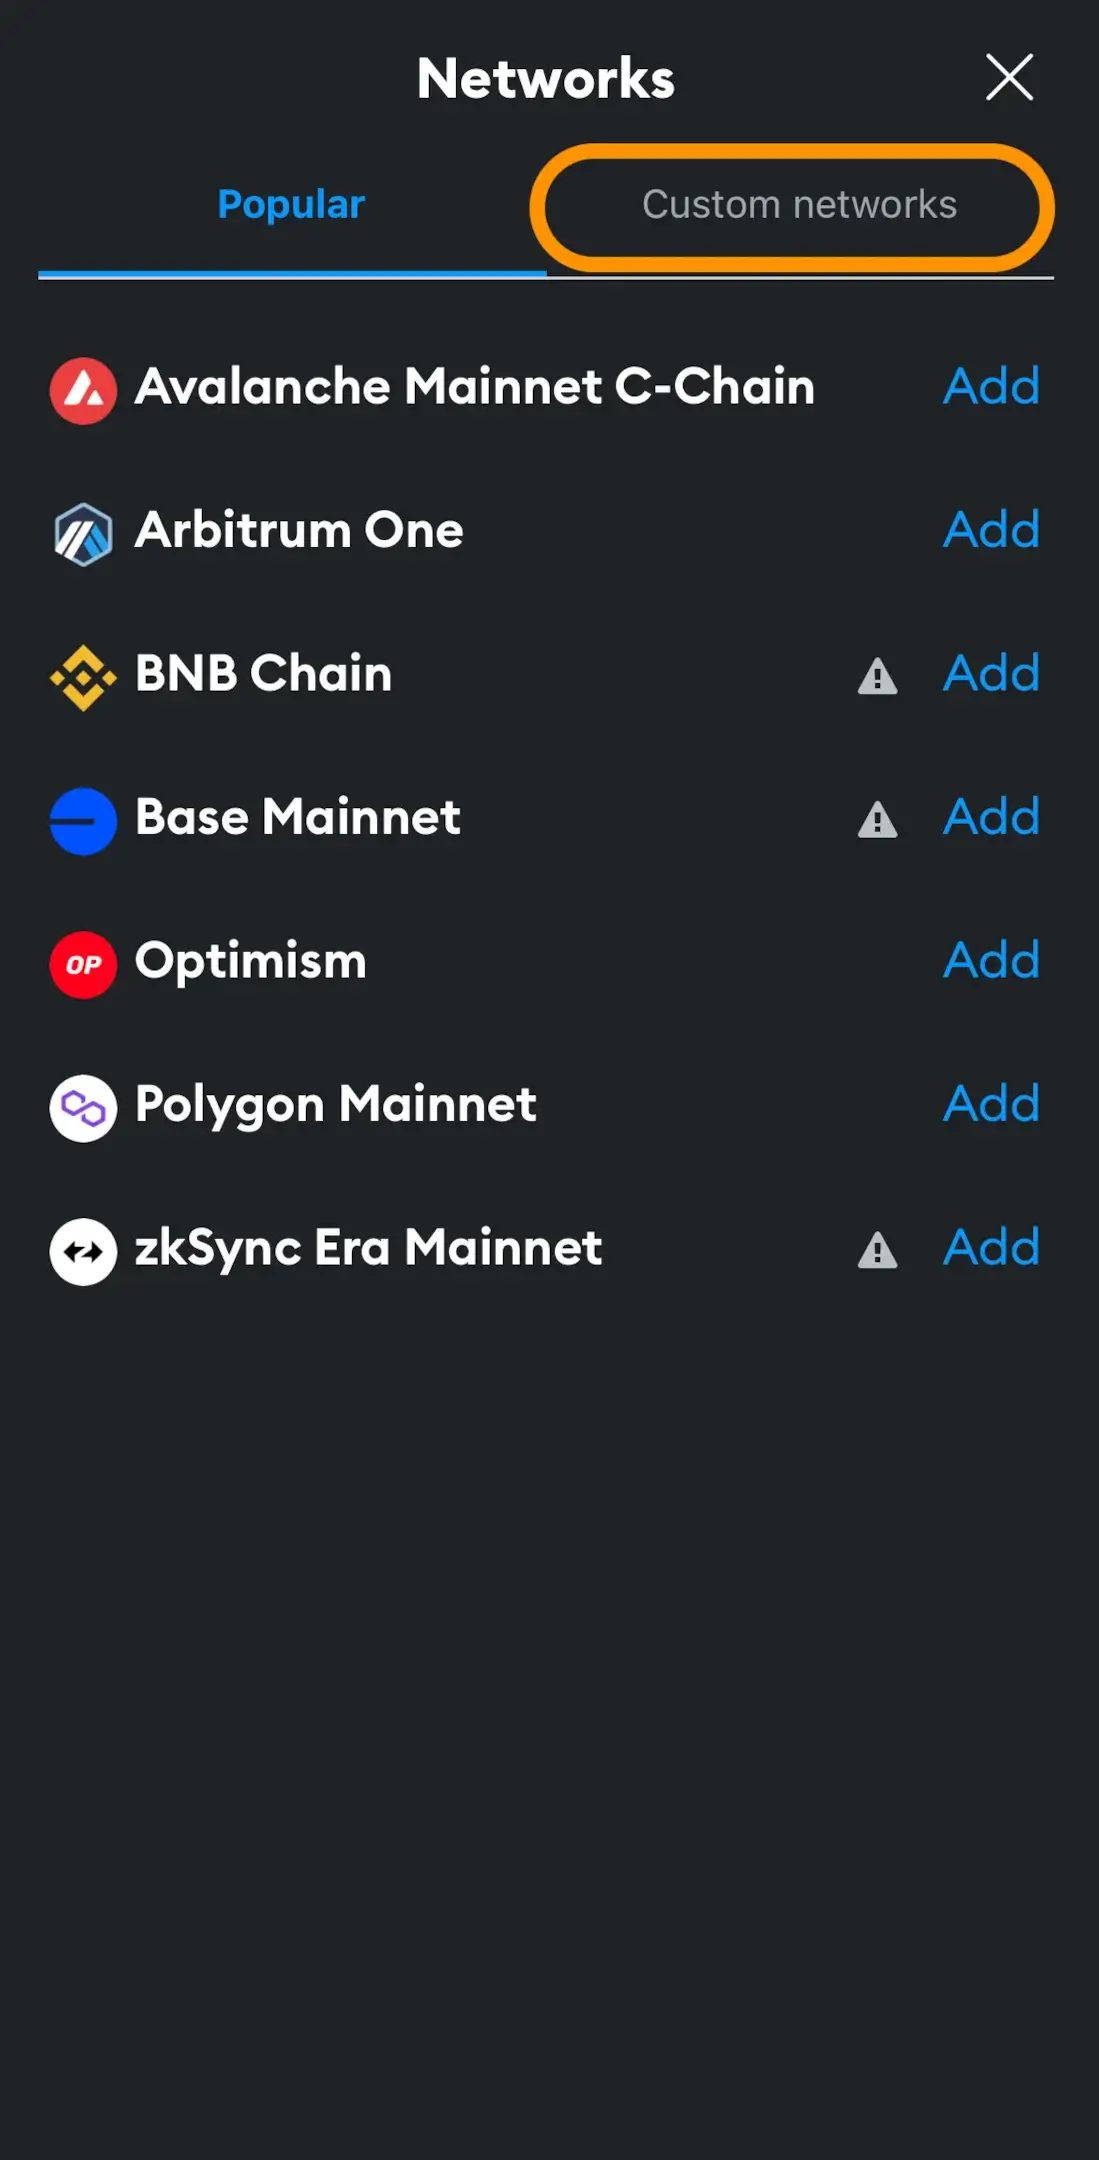
Step 4: Go to Custom Networks
In order to manually add Polygon, you have to go to custom networks.
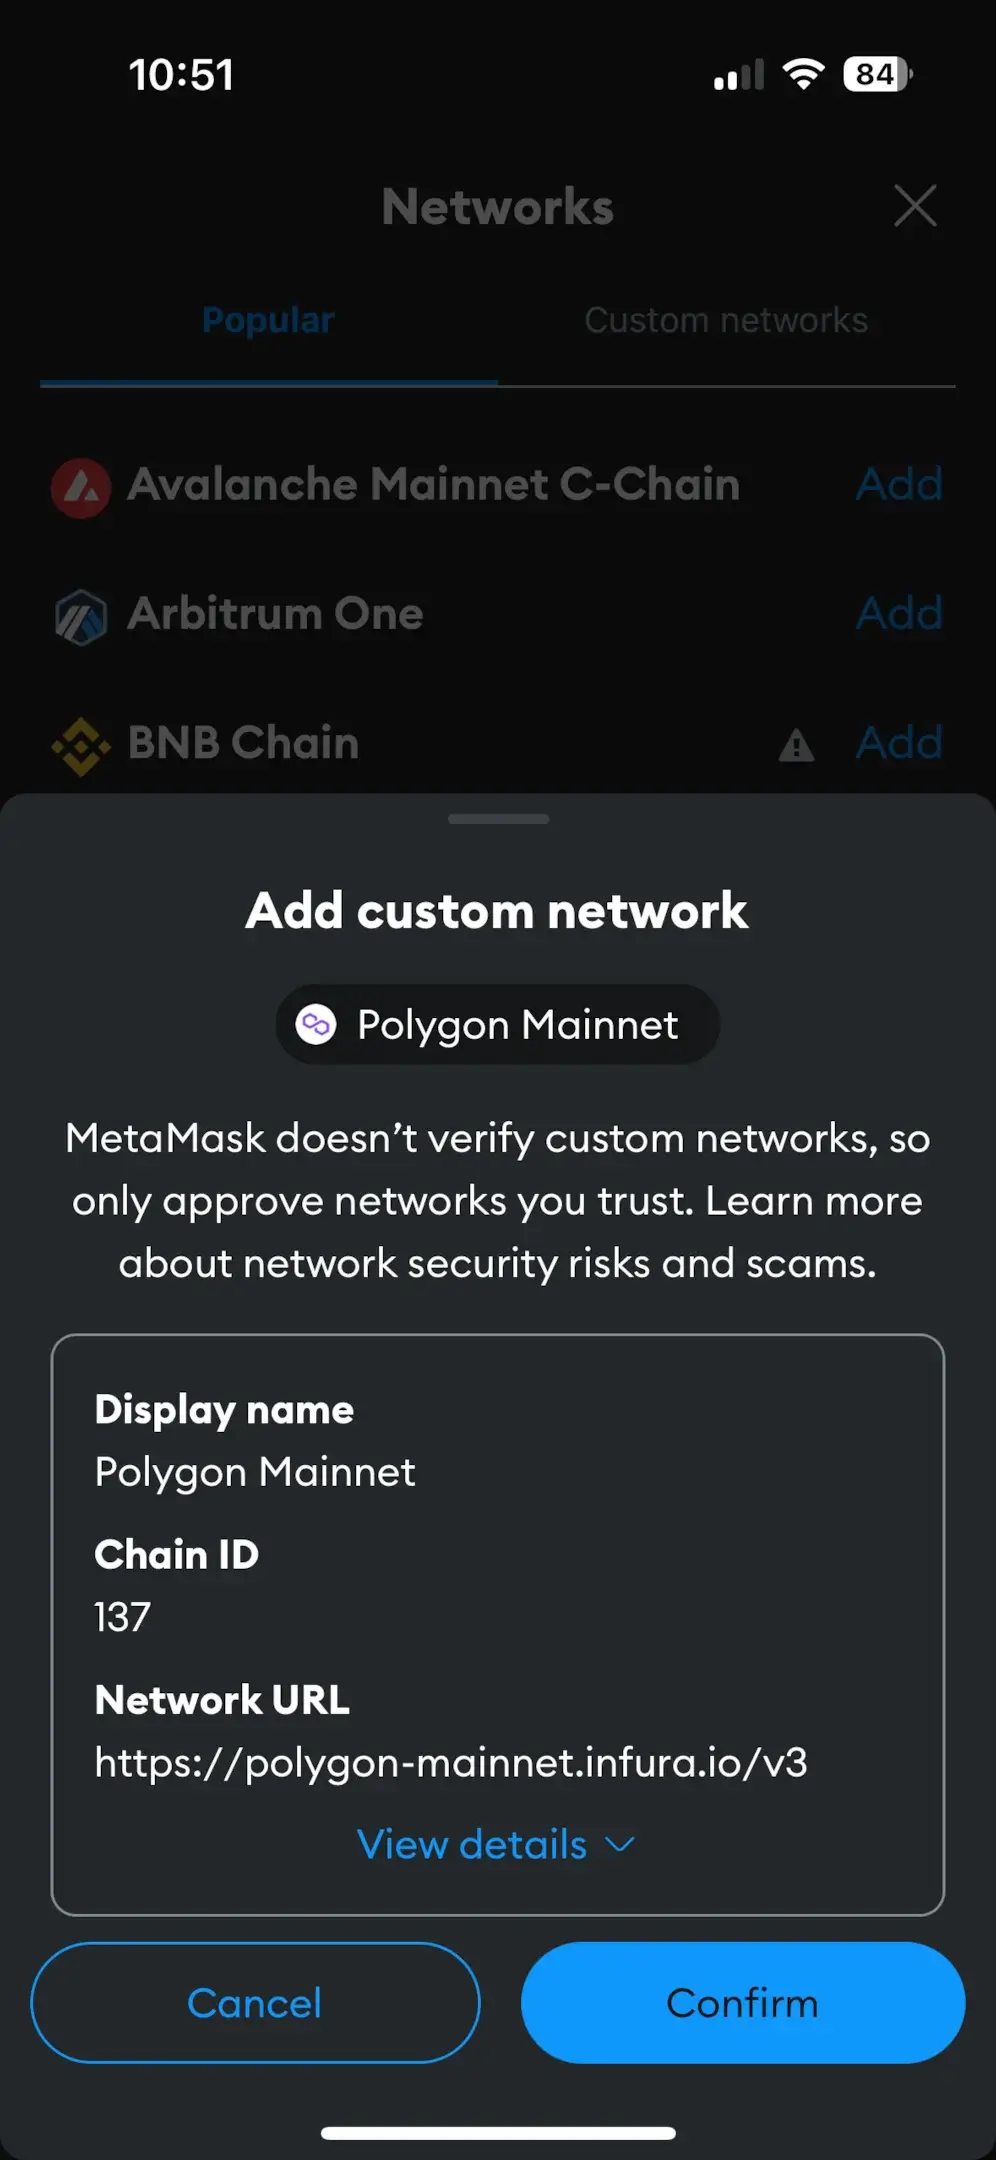
Step 5: Fill the Spaces with Polygon Network Details
Fill in the network details as outlined in the below screenshot. After entering the details, confirm the addition.
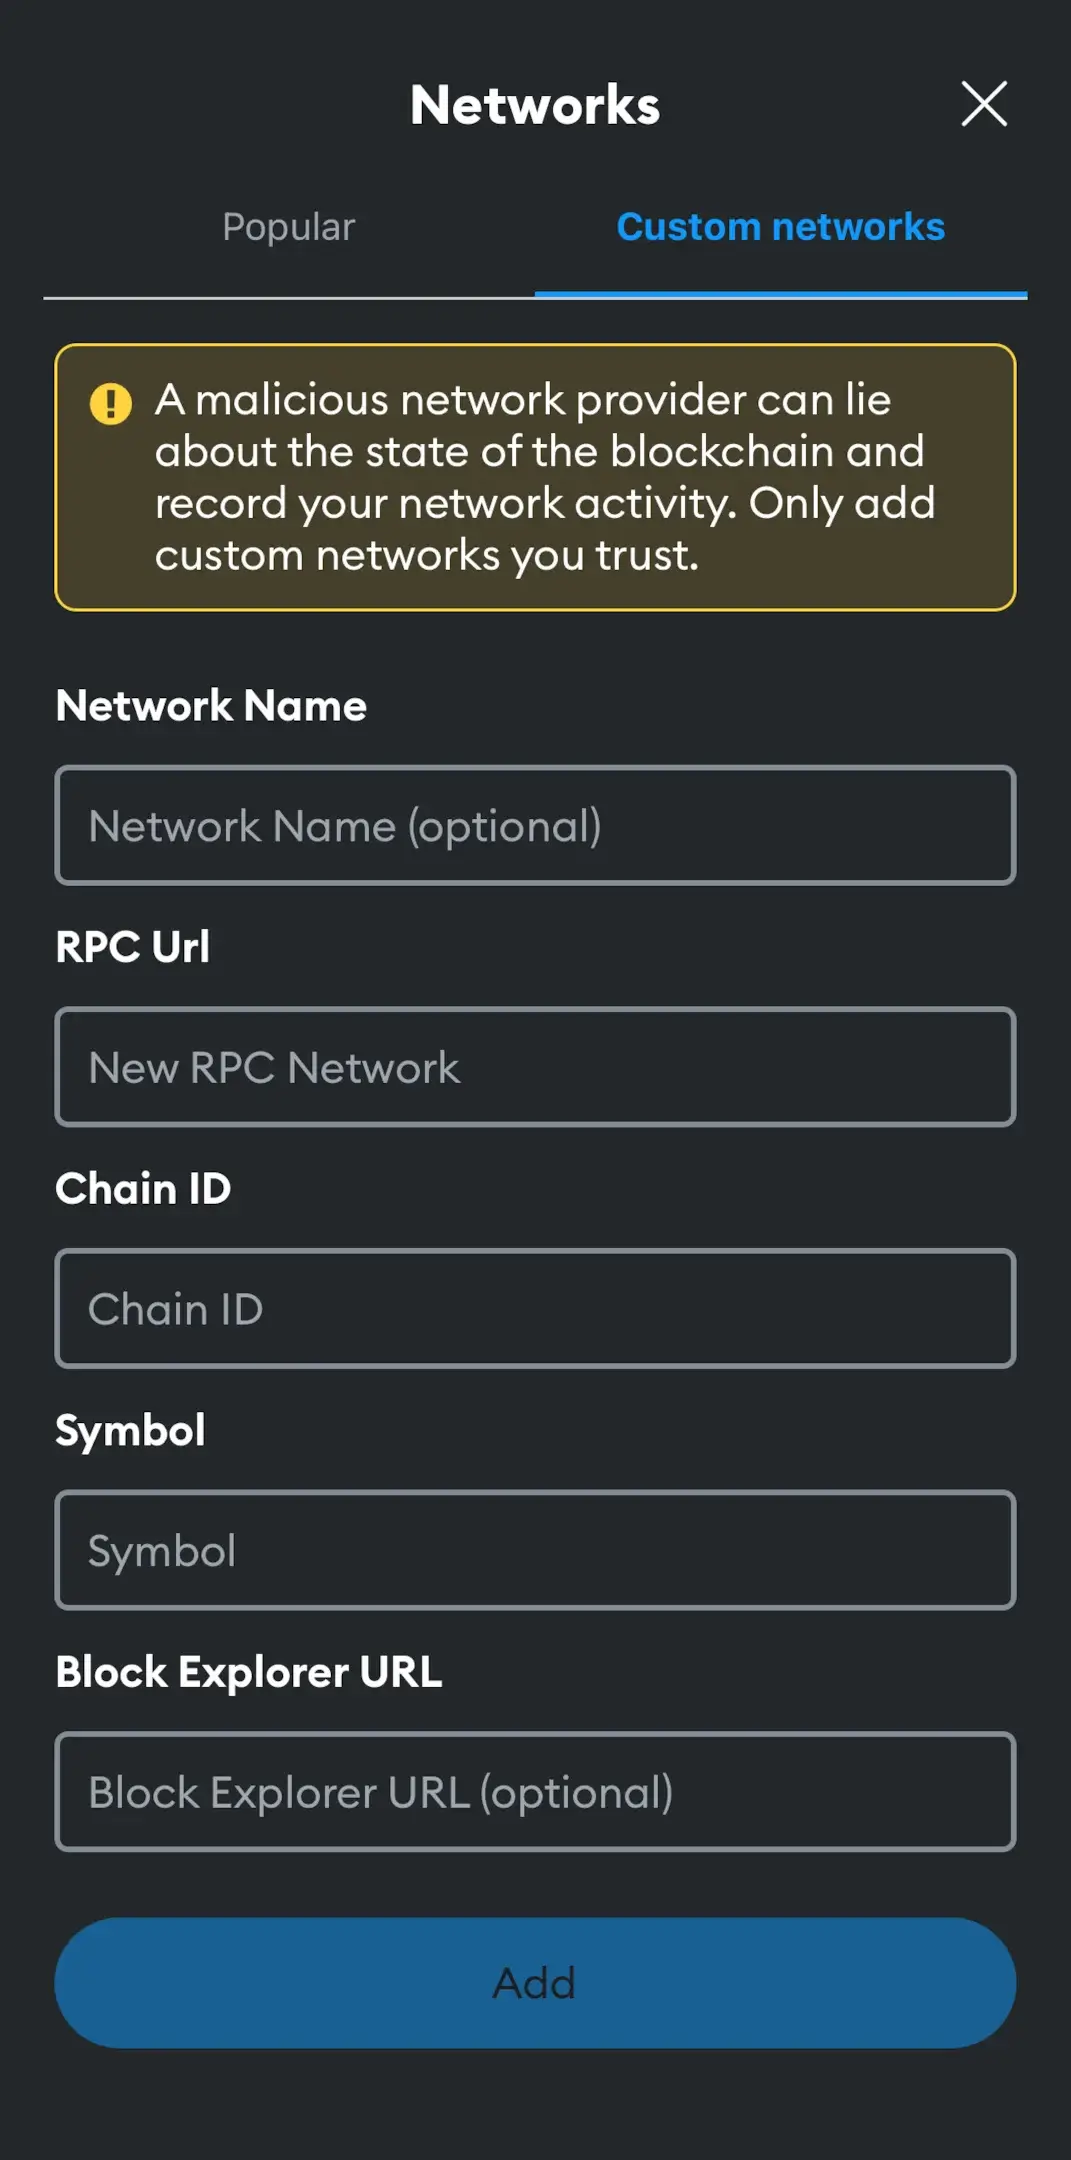
To access the Polygon network, you will have to fill out the details from the screenshot below to ensure that you have introduced the following details correctly.
- Network Name: Polygon Mainnet
- New RPC URL: https://polygon-rpc.com/
- Chain ID: 137
- Currency Symbol: MATIC
- Block Explorer URL (optional): https://polygonscan.com/
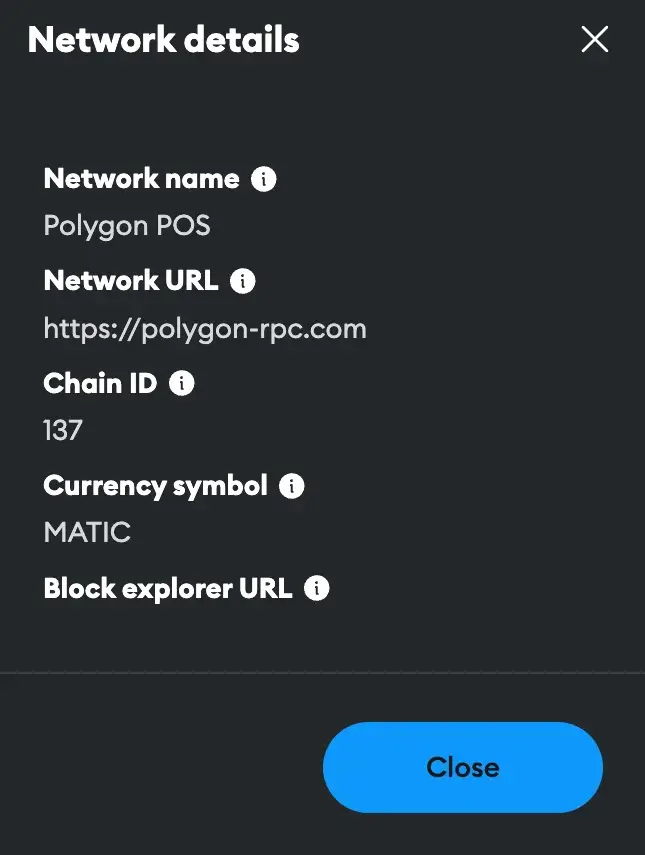
After that, another page will open to confirm the correct information. MetaMask will display a pop-up stating that it doesn’t verify custom networks but only approves network trust.
After the pop-up appears on the mobile screen, you will receive another pop-up informing you that the network has been added to your list of other networks. You can then switch to a different network on the new network or stay on the current one.
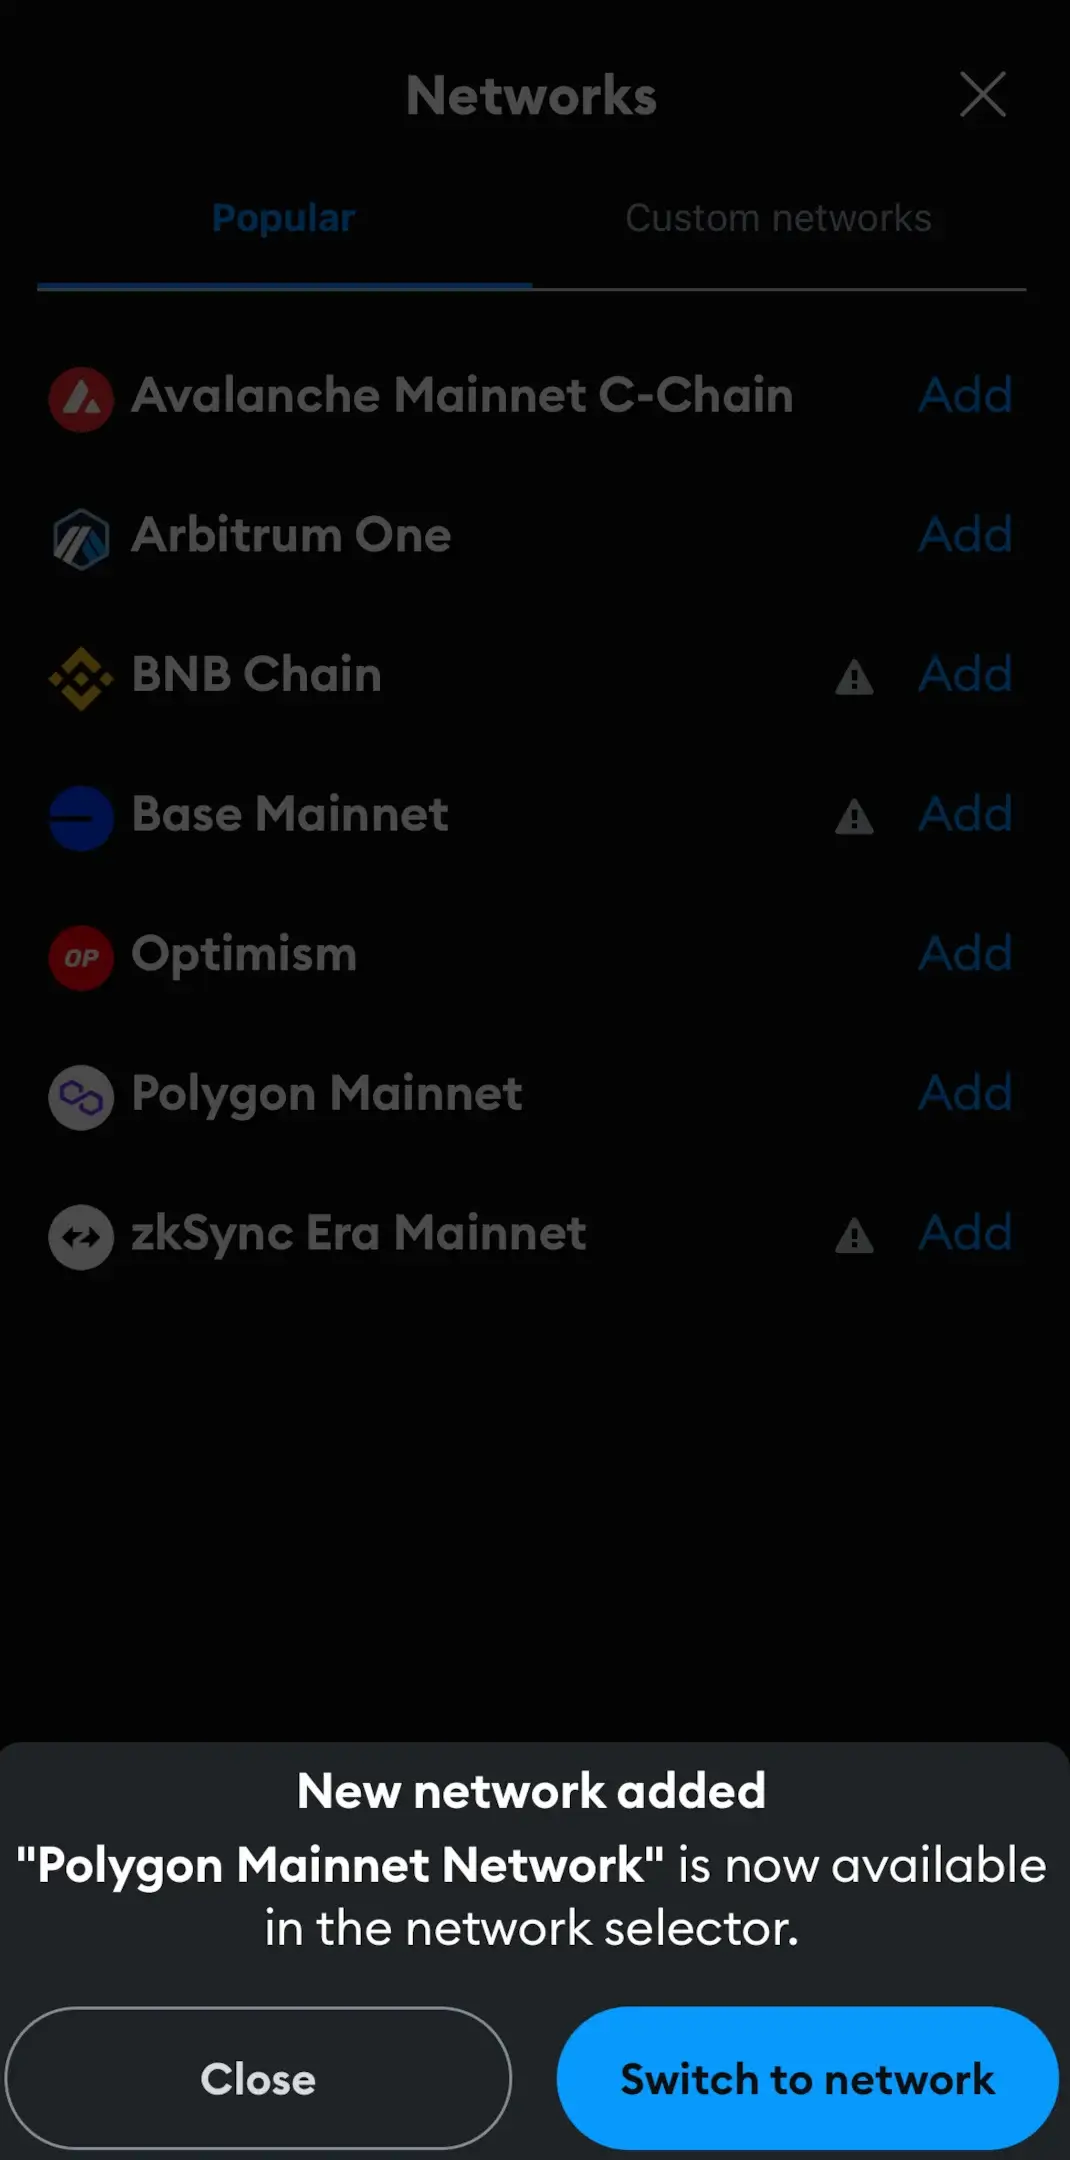
Now, you have added the Polygon network to the MetaMask wallet, and you can access it whenever you want.
How to Add Polygon to MetaMask With ChainList
To add Polygon to MetaMask using ChainList, follow these steps:
Step 1: Connect MetaMask to ChainList.
Visit ChainList and ensure your MetaMask wallet extension is connected to your browser.
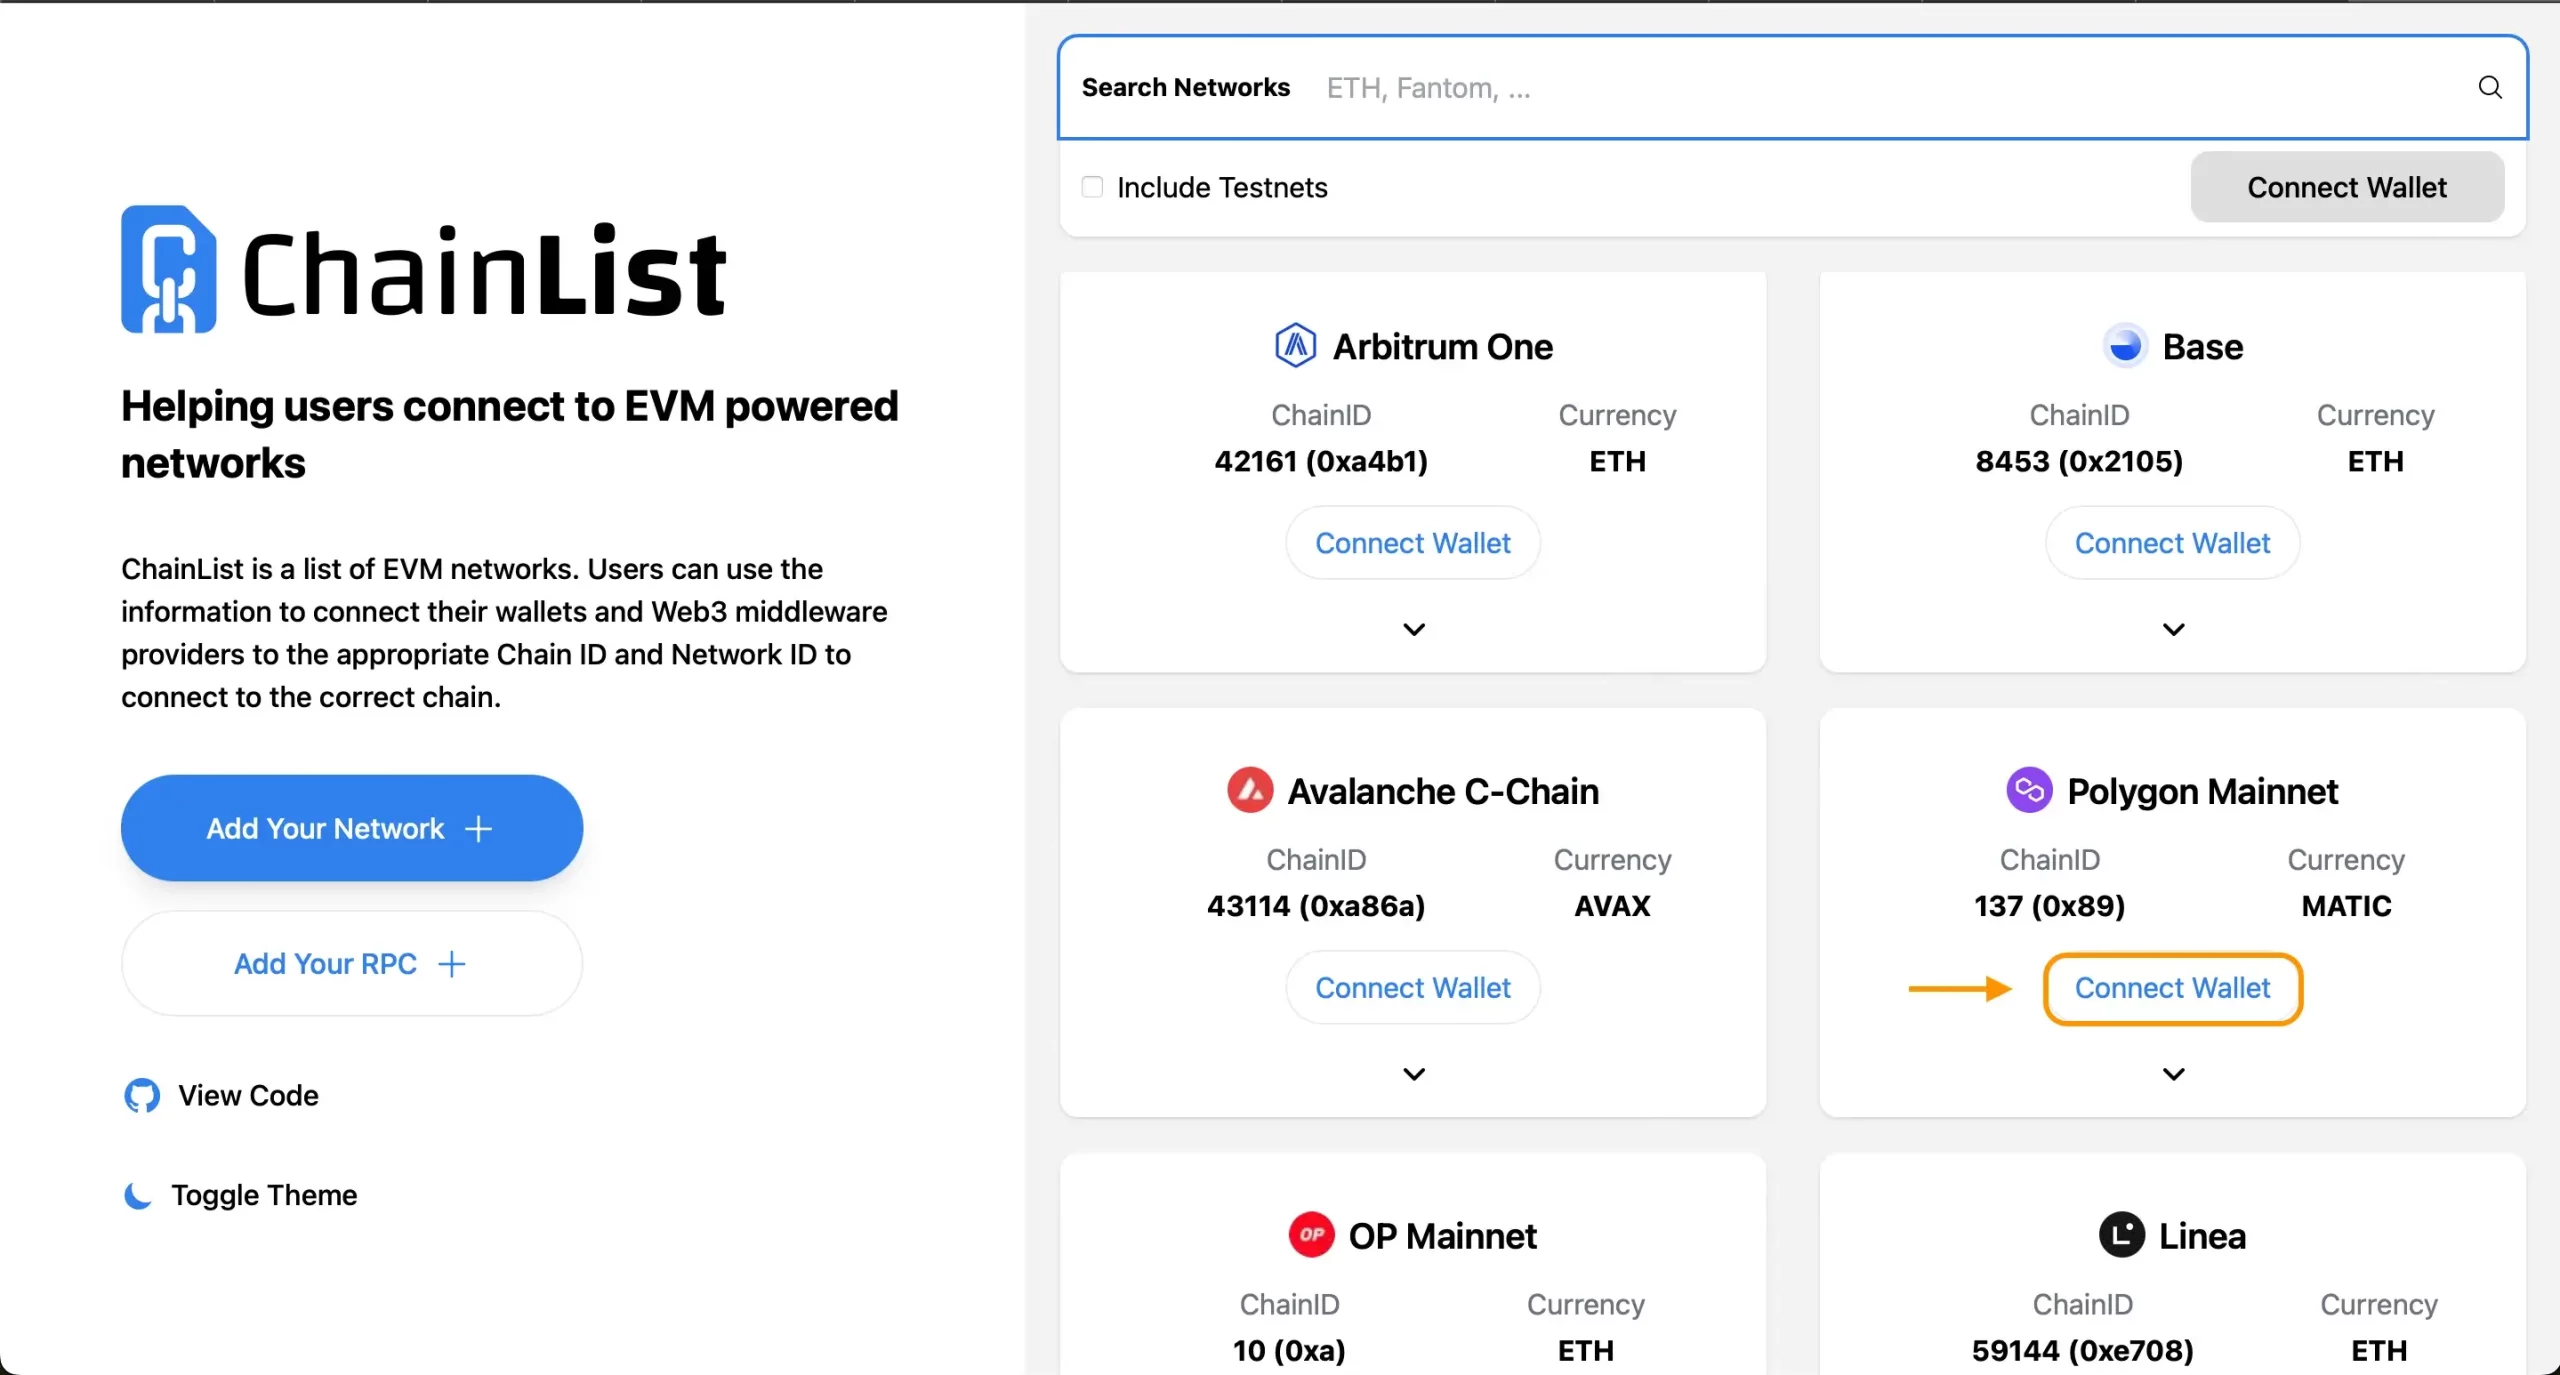
Step 2: Search for Polygon
Search for “Polygon” in the network list and select Polygon Mainnet with Chain ID 137. Click “Add to MetaMask”.
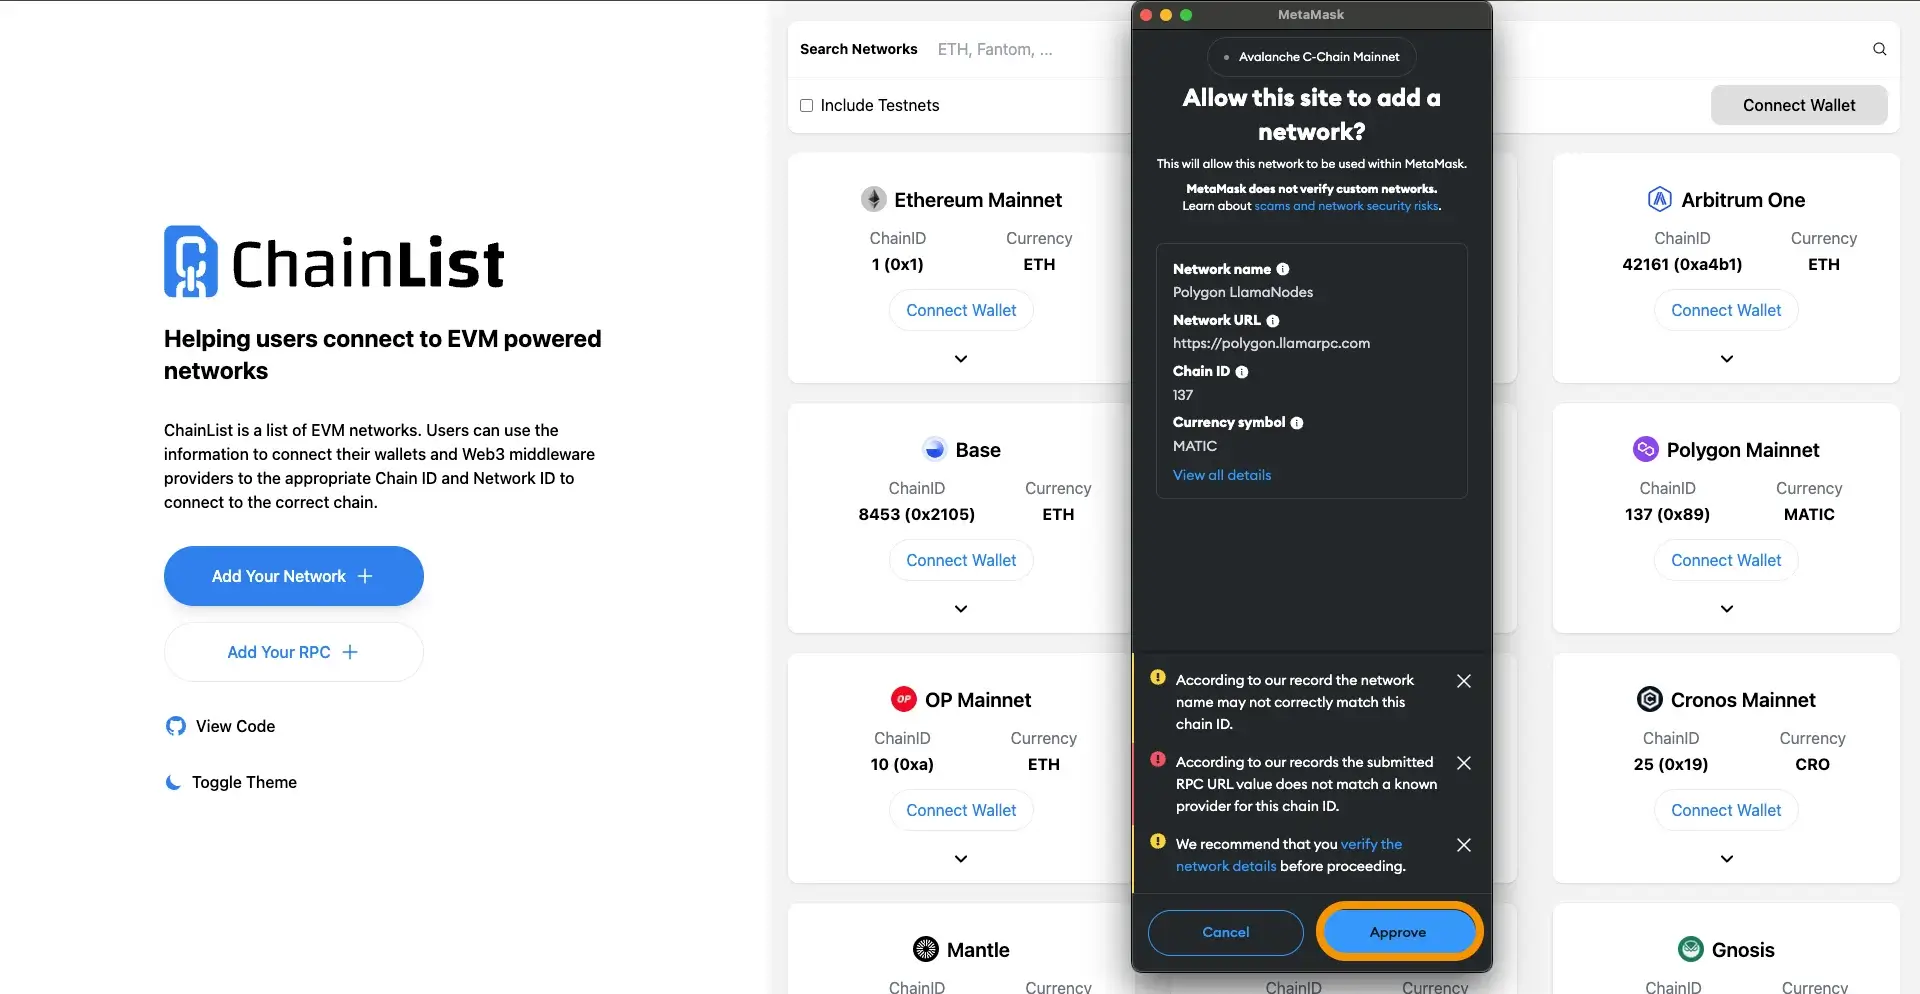
Step 3: Approve Network Addition
When prompted by a MetaMask notification, click “Approve” to add the network to your wallet.
Adding Polygon Tokens to MetaMask
To add Polygon tokens to your MetaMask wallet:
- Open MetaMask and Switch to the Polygon Network
- Click “Import Tokens”
- Enter the Token Contract Address. You can find the token’s contract address on PolygonScan.
- Automatically fill in the Token Symbol and Decimal Places
- Confirm by Clicking “Add Custom Token“
FAQ
How do I add Matic to my MetaMask?
Ensure you’re on the Polygon network. Then, receive tokens by copying your Polygon wallet address from MetaMask and sending MATIC to it.
Are Polygon and Matic20 the same?
Yes, Matic20 is the token standard for the Polygon network.
Is Polygon Network ERC20?
Polygon uses the MATIC token, which is compatible with ERC20.
How to Copy Polygon Wallet Address on MetaMask?
Switch to the Polygon network and click on your account name to copy the address.
What is a Polygon Network?
Polygon is a scaling solution for the Ethereum network, enhancing transaction speeds and reducing costs.
Conclusion
Adding the Polygon network to MetaMask enhances your ability to interact with decentralized exchanges and manage transaction fees efficiently. By following these steps, you can seamlessly integrate the Polygon network into your MetaMask wallet, whether using the browser extension or the mobile app. Enjoy the benefits of a more scalable and cost-effective blockchain experience with the Polygon network on MetaMask.